Showing posts with label DIY. Show all posts

Jul 10, 2013

Candlestick - DIY


I have had this candlestick for a long time and really like it.
It has two others that are in the set, all different heights.
The only problem, is that I'm not crazy about the dark color anymore.
Time to do a little painting....


I took them to the backyard and spray painted them white.


I wanted them to have some texture.
I bought this glaze at the hardware store and had them add some black paint.
The can is full, so there isn't much room to add paint, just a little.


With the smaller foam brush, I painted the ridges of the candlestick lightly.  Then I wiped it off with a dry paper towel.
The grooves are now a little darker, giving a distressed or antique look.
You can add as much or as little as you want to.


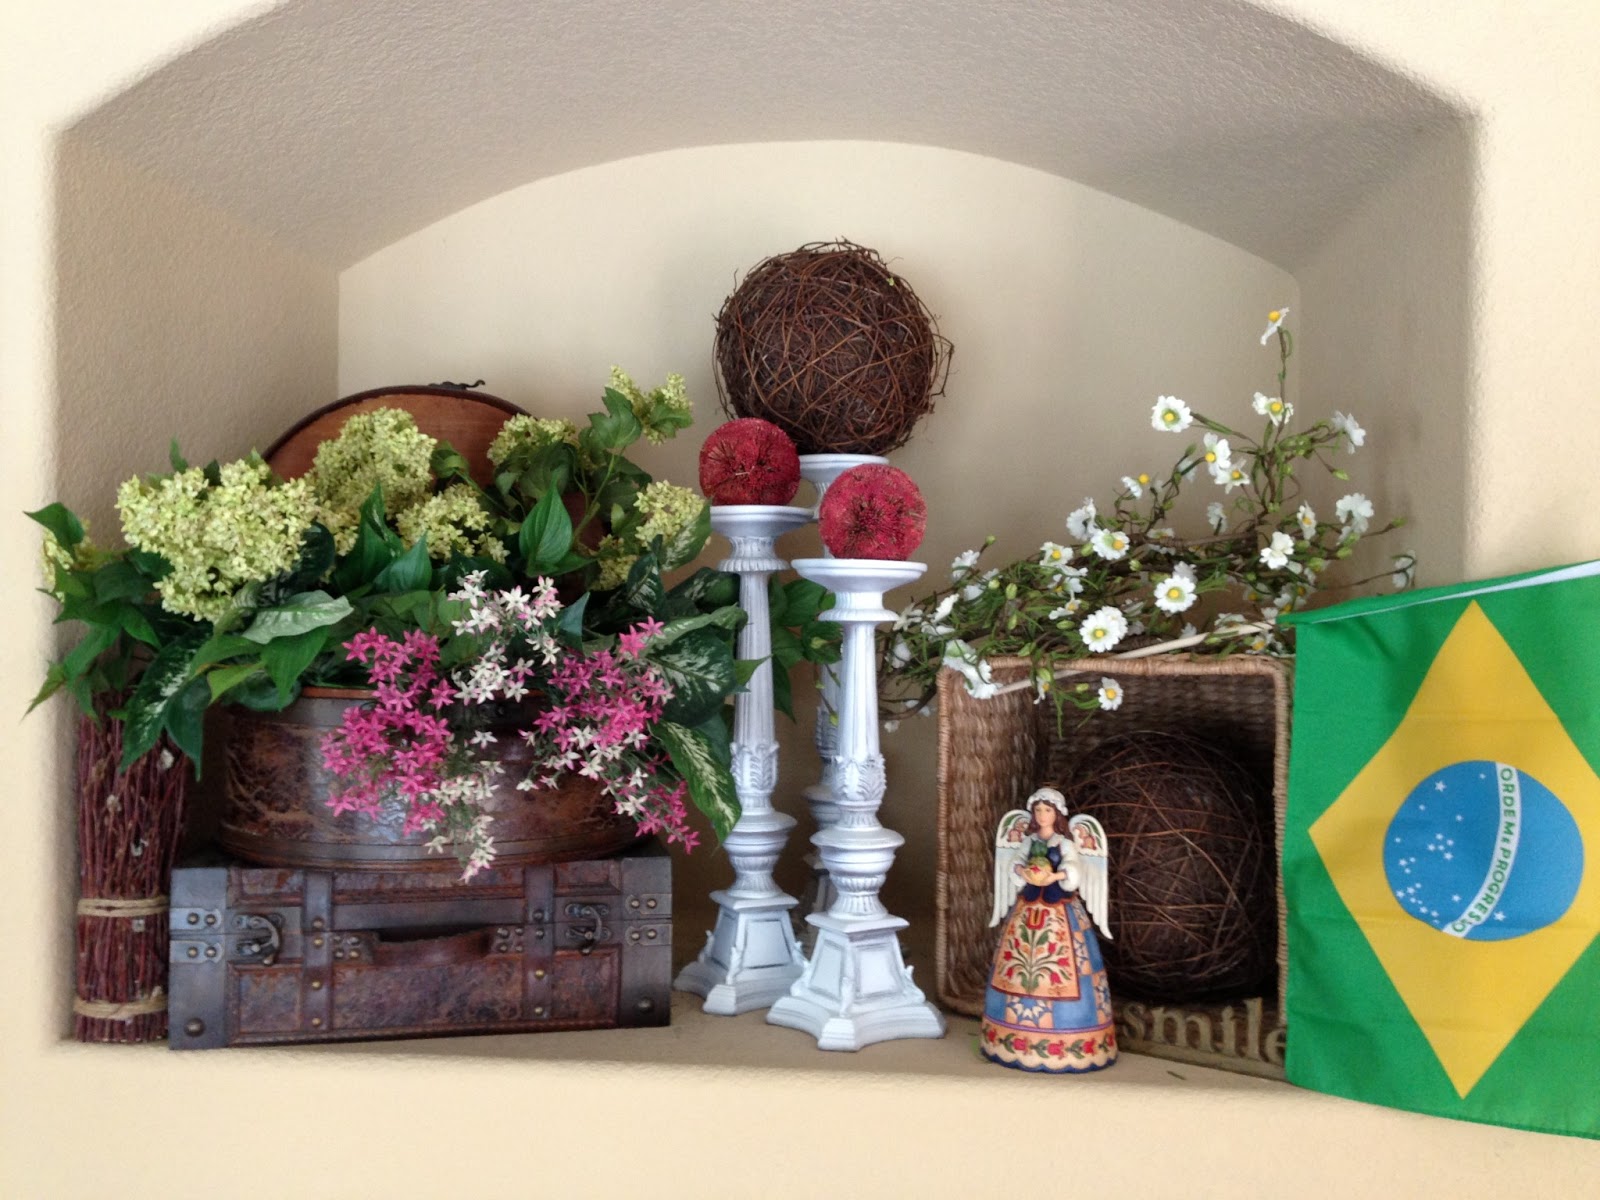
Now the candlesticks don't blend in with the rest of the decor.


That spray paint dries really fast.
The whole project took about an hour and a half, including drying time.
Does this inspire you to paint something in your home?


post signature

Nov 14, 2012

Angel Picture DIY

My husband bought an angel picture for our bedroom in the 1980's.  
Our bedroom was painted blue with blue flowered wallpaper, and angels were popular then.
After many years, we were tired of the picture.
I recycled it to the bathroom which had a huge empty space.
Wow, naked cupid angels in the bathroom :)


We moved again and this time there was no big "hidden" wall to hang the angel picture.
I told my husband that we should get rid of the picture.
He was more than happy to oblige because he hates clutter.
I took a second look and realized that the frame was really nice.
It has two different flower motif.


I have been wanting to hang a chalkboard in the house and this frame would be perfect for that!
The picture is matted, so I was just going to remove the matte and assumed the angels were printed on cardboard.  Not so!
The print was paper, and was only a little larger than the opening of the matte.  
There was a heavy cardboard on the back of the matted angel picture and it was all attached.
I took out the picture, matte and cardboard and painted spray painted the cardboard with black chalk paint.  So easy!!!
I painted the frame aqua, and rubbed a black glaze over the motifs.


Voila!  I got Sean to write his favorite scripture at the top before he left for his two year church mission to Brazil, two years ago.
Then I wrote a cute quote on the rest of the chalkboard.
I want to get a nice Thanksgiving quote to put on there.
This project was so easy!

Jun 25, 2012

A change of color

Years ago I bought this wood shelf/quilt hanger.  It was unfinished, I painted it black and finished the edges with sandpaper to give it a distressed look.  


I was tired of the black shelf next to the black table, so I decided to repaint it.  I love the color of this little green shelf, so I took one of the drawers to Walmart for a color match.


Yes, the color looks just like the color on my little shelf.


I lay my trusty drop cloth "brown paper" on the driveway (don't want to risk getting paint on the floor) and am ready to get started.


The green paint is not covering the paint very well.....


I decided not to be lazy and spray the black shelf with white primer.


The green paint looks so much better on the white.


A cheap paintbrush does a great job with this project.


I'm not very pleased with the results after the first coat of paint.


The second coat of paint looks really good.


I like a distressed look, so I asked the man in the paint department to put some black paint in the glaze.  He said that he wouldn't be able to put much in, because the can is so full of glaze.  That would be perfect, just the look I want!


I lightly brush the glaze where I want it, and wipe it off with a damp cloth or sponge.  


It looks a little blotchy, but definately distressed.
This was the first project that I used a paintbrush to paint the wood.  I have always used spray paint in the past.  I think I will use spray paint from now on, it has an even coverage, no brush strokes and I love the results.  The only drawback is that your finger gets sore from holding the nozzle!


I really like the results.  The shelf is quite high up on the wall, so no one can see the little imperfections.  I hope I have inspired you to paint a piece of furniture in your home :)


post signature

May 9, 2012

DIY Fireplace

We have been in our new home for less than a week.  There is a wood burning fireplace in the family room.  It was dirty looking from the smoke stains.  I thought it would look really clean and fresh if it were painted white.  Went to Lowe's and got some paint for stone, a white satin.  I never like flat paint, and gloss would be too shiny.  Satin was just right!  Like the three bears and their porridge....lol


Do you see how the stains make the paint look dirty?


The blue is tape.  I enjoy that part of the painting, taping out the areas you don't want painted.


The white fireplace will match the wood entertainment center that our TV doesn't fit into!


The white paint really makes the beige paint look dirty!


Finished!  I think it looks great!  It was really easy, the paint didn't soak into the stone.  The paint went over the existing color so easily.  A really simple and inexpensive way to spruce up a room.


I came home from teaching a quilt class and my husband had the mantle completely decorated :)


post signature